Printer Set Up - Ethernet Printer
Step 1: Plug in and Set Up the Hardware
Please follow the manufacturer’s setup instructions that come in the package. Make sure that the printer is plugged into the power outlet, and make sure it is switched on and that there is paper in the device. Follow the manufacturer’s guide to make sure the paper is inserted correctly. Please make sure the ethernet cable is securely plugged into both the printer and internet source. Lastly, ensure that the cash drawer cable is securely plugged into the printer.
Step 2: Obtain the printer network information, this will be used to input into Nōwn in the next step.
- Ensure the printer is off. Press and hold the print button, while holding the print button, turn on the printer.
- Release the print button.
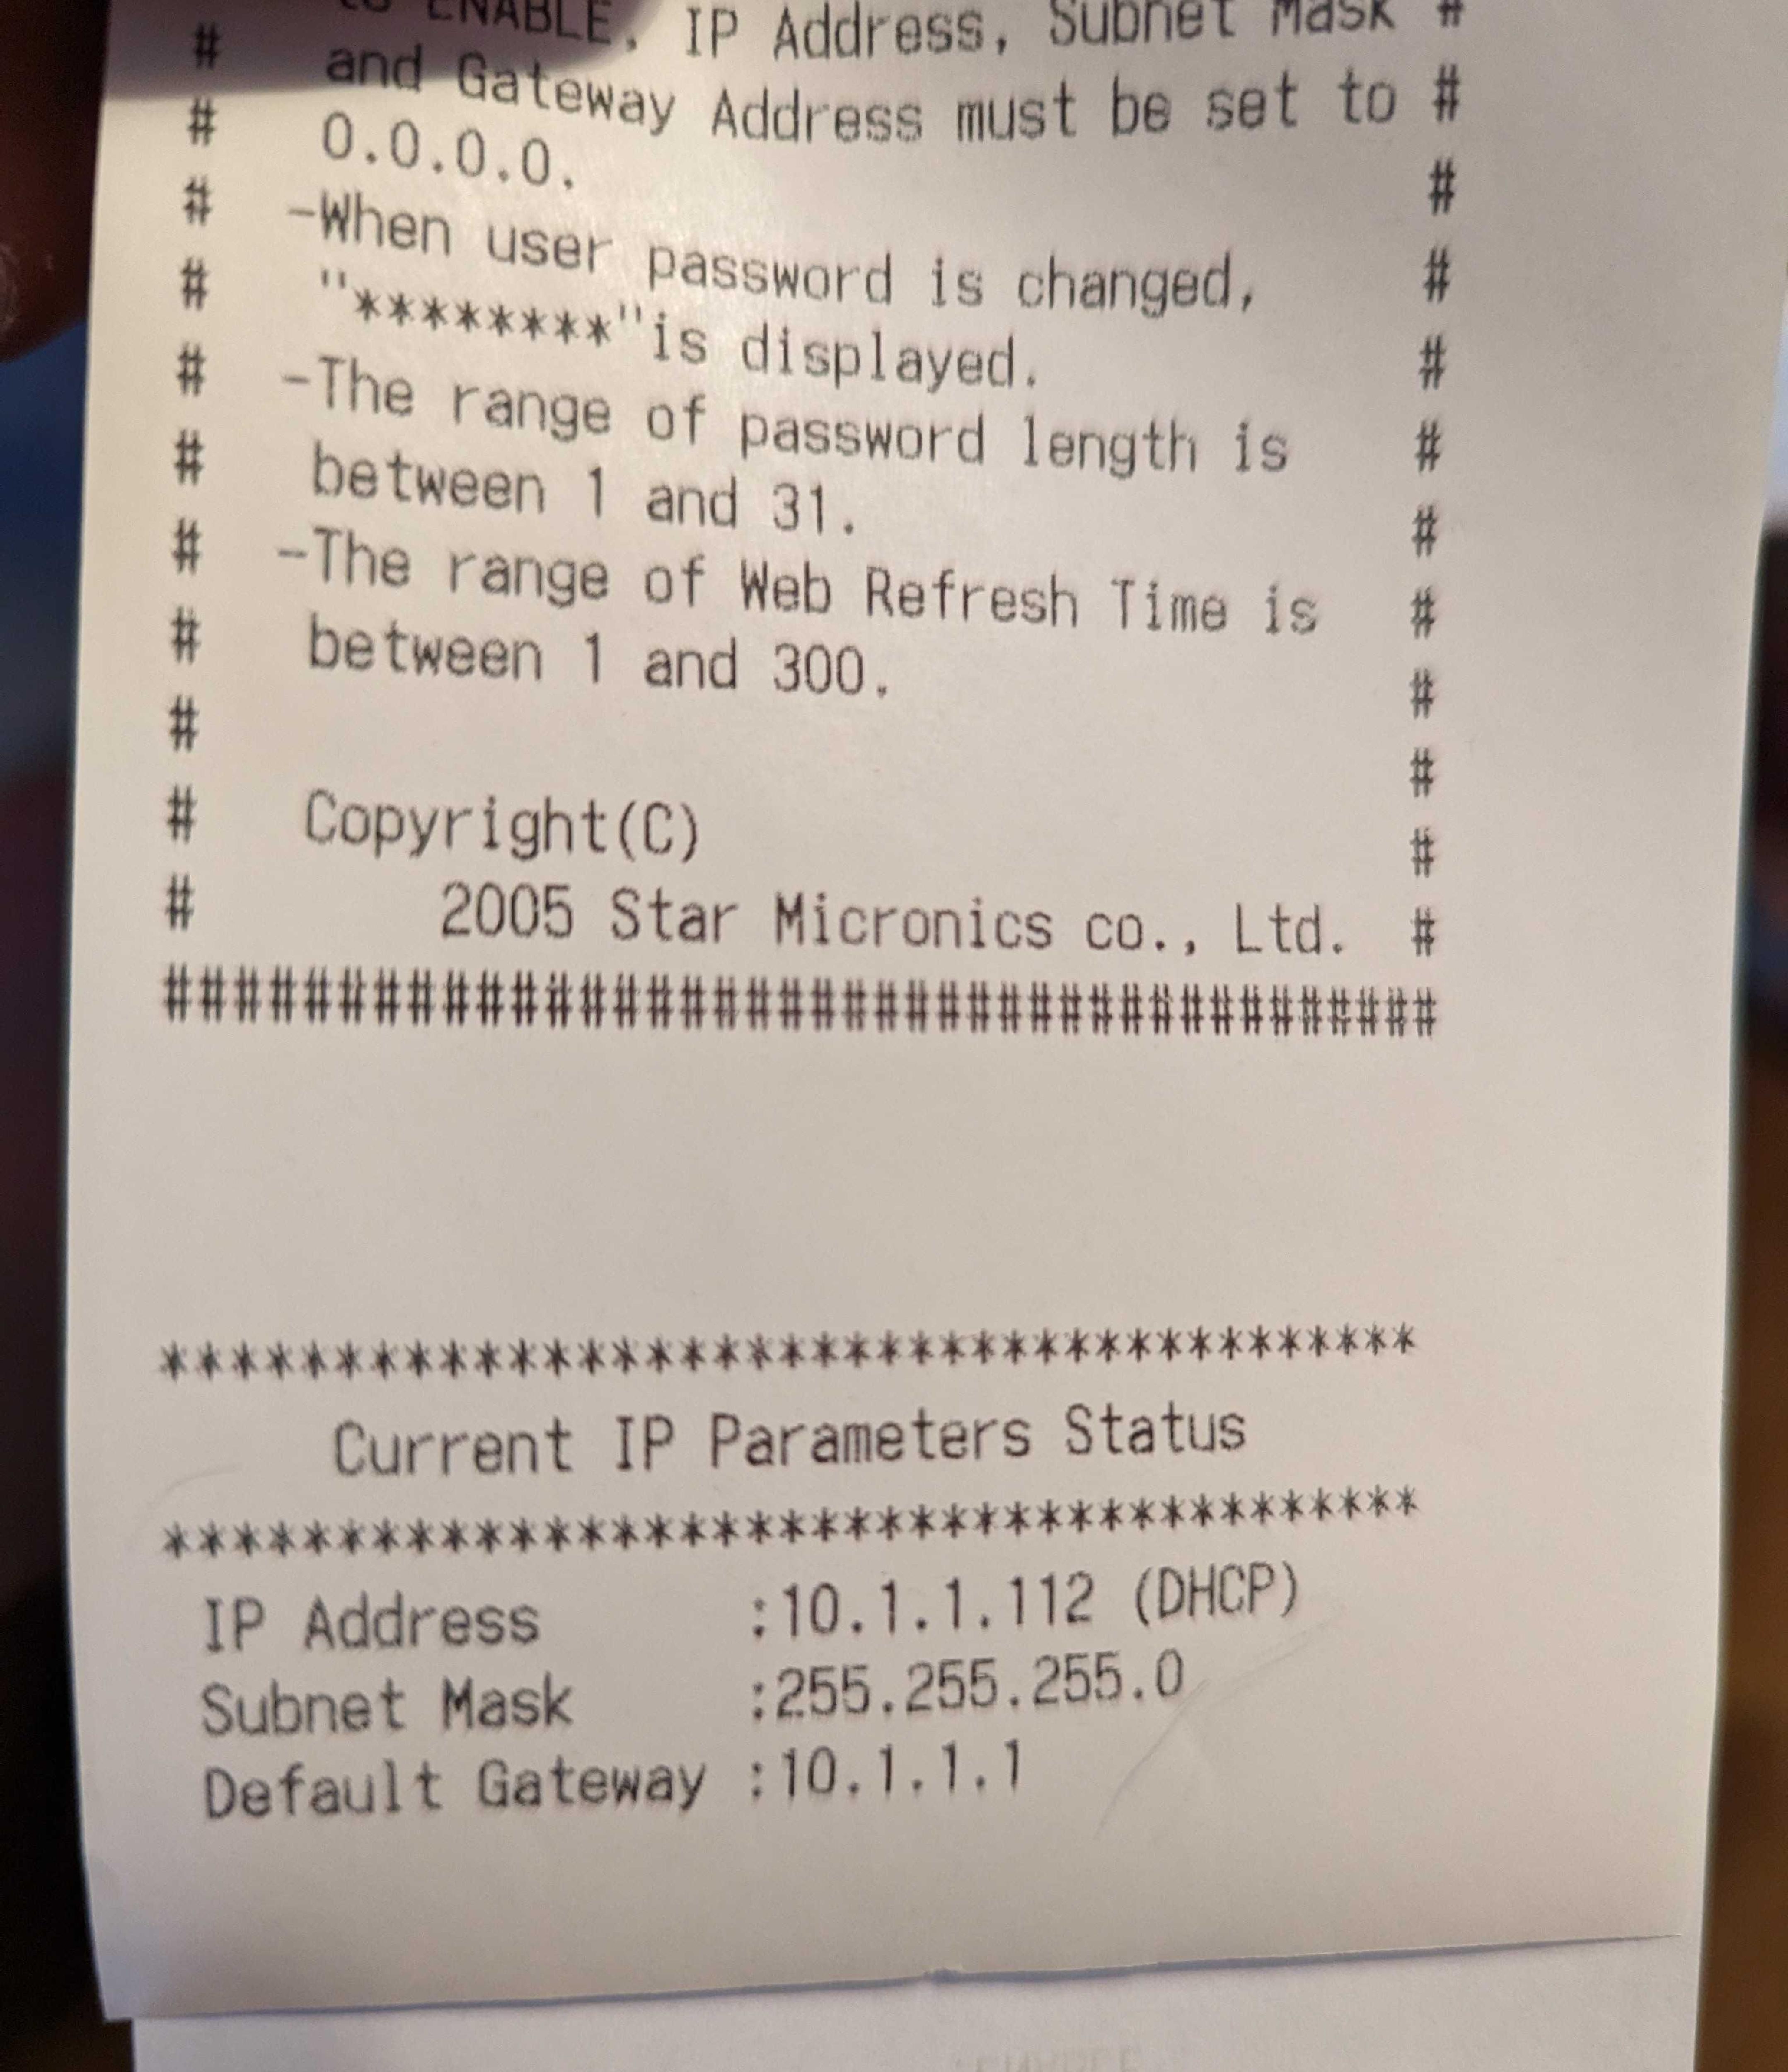
The printer should be printing at this point. The IP address will also be shown on this paper, make sure to note down this address as it will be used later when configuring the Nōwn POS. If IP address is 0.0.0.0 there is no ethernet connection which could be for one of three reasons:
1. Your ethernet cable is not connected properly to the terminal, ethernet port, or both.
2. Your ethernet cable is faulty, replacing the cable would solve the issue.
3. There is no internet coming from the ethernet port, in this case you would need to contact your internet service provider.
Step 3: Configure printer to station in Nōwn
1. Open the NōwnPOS app, log in with your credentials. Press skip tutorial and go to the Setup section.
Note: if you do not see the Set Up tab it means you are logged in as a Station user. Please ensure you are using the admin account, this is the one whose account details you received when you signed up for Nōwn
2. Open Station Setup.
3. Click on the pencil icon to edit POS stations or +Add Station to add a station if you haven’t created any yet.
Which station you link it to is very important. If you link a printer to POS 1 then you must log in as POS 1 when you use Nōwn, otherwise doing a transaction will trigger the wrong hardware.
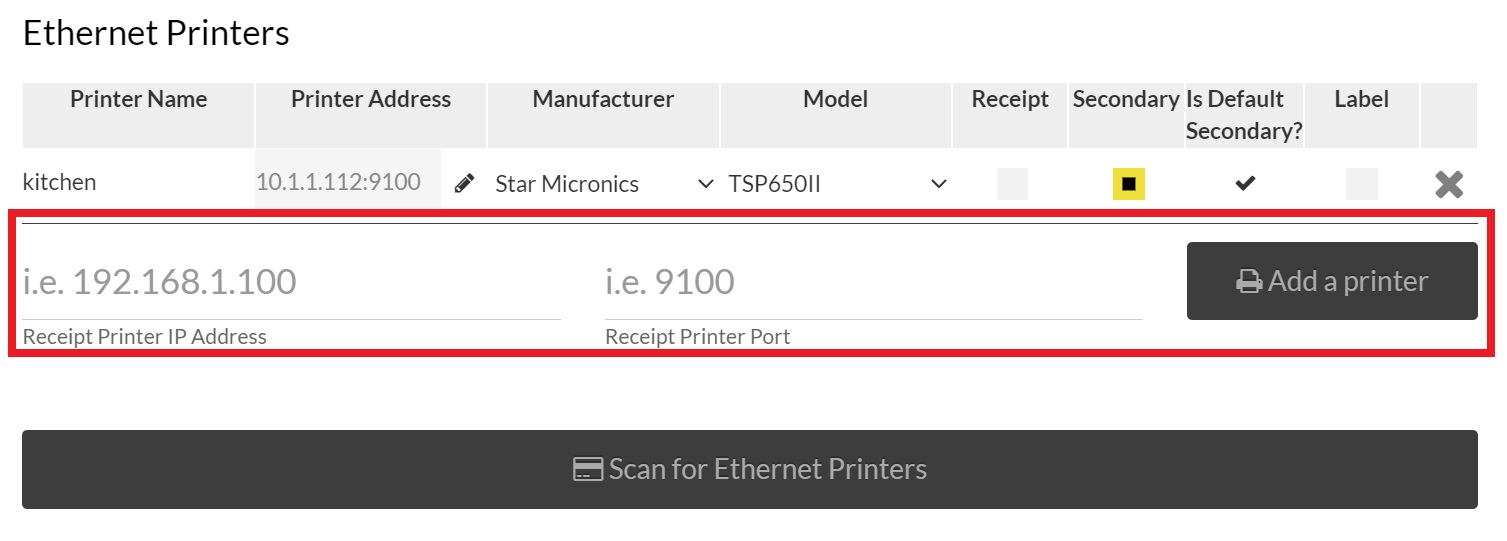
4. Go to Ethernet Printers section, all you need is the printer IP address and receipt printer port. The Receipt Printer Port is 9100! Once again when you’re done click “Add a printer”.

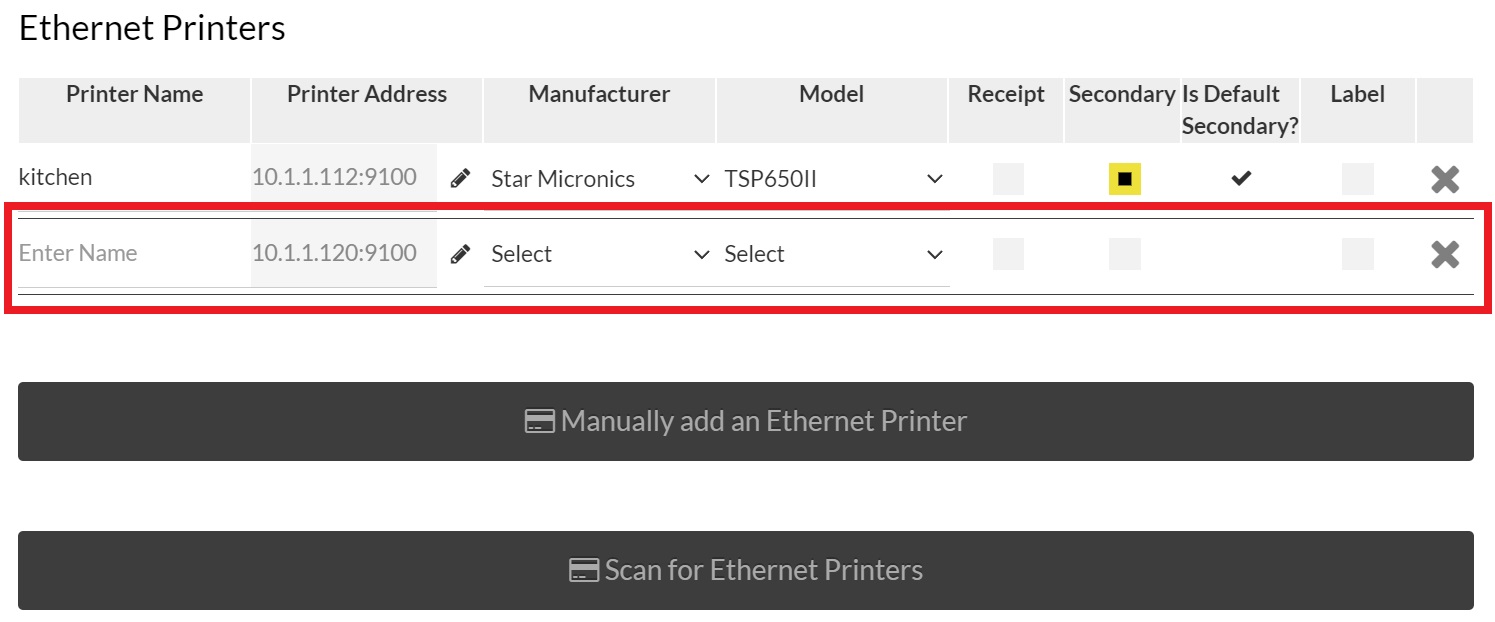
5. A new field will appear, you need to make sure you: set the name of your printer, check off the Receipt box, and the make and model of your printer. If you are trying to add a kitchen printer please follow these instructions. Please select the right printer make and model otherwise your receipt format will be wrong.
6. Don’t forget to save changes at the bottom of your page.
PLEASE REPEAT THIS STEP FOR EACH IPAD. EACH PRINTER MUST BE CONFIGURED TO A SPECIFIC IPAD